
Add Employee General
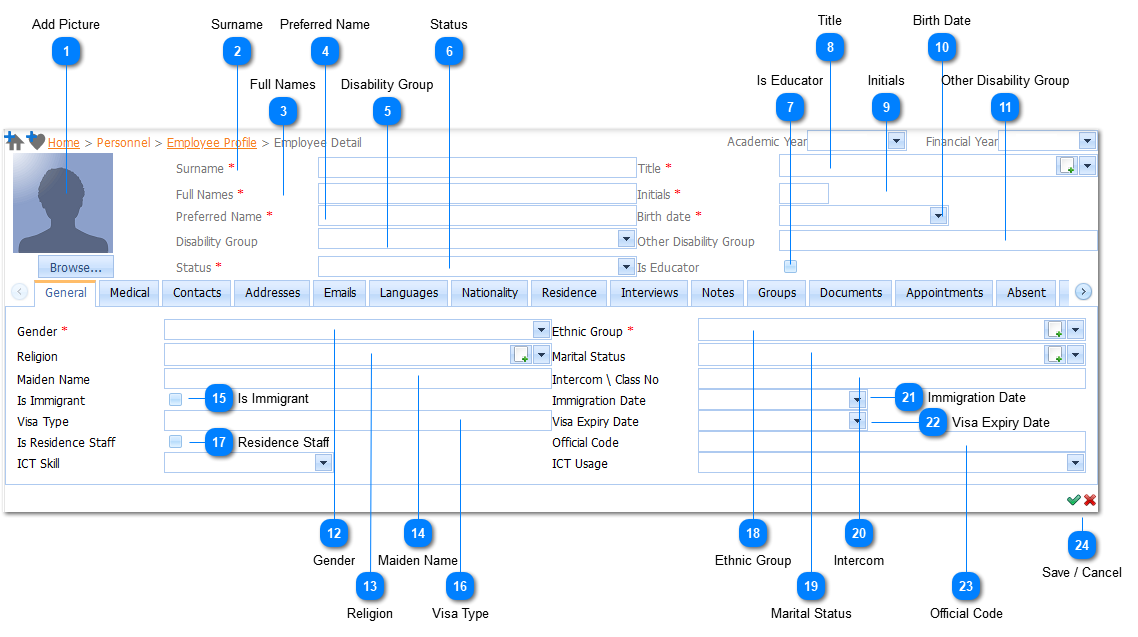
Add Picture
The user can upload a picture of the Employee. Upload the Employee Image by Left Clicking on the Browse button (Refer to Student Profile Upload Student Image).
(i) *.JPEG
(ii) *.PNG
(iii) *.GIF
(b) The Image file size is limited to a maximum of 1 Mb.
|
Status
The Employee Status is a Required field (
Example :
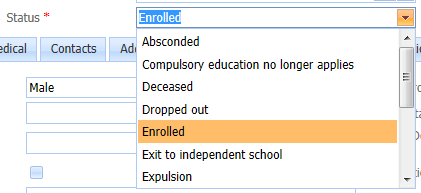
To Add/Change Employee Status records - Refer to Person Status. Select the applicable Employee Status by Left Clicking on it in the list. The user can type in the a part of the Employee Status. With each letter that is typed in the system will filter the Employee Statuses in the list. Should the user not enter an Employee Status and attempts to Save (
|
Title
The user selects the Title by Left Clicking on the Drop Down List Box (
Example :

Select the applicable Title by Left Clicking on it in the list. Should the user want to enter a new Title it is done by Left Clicking on the Add Button (
|


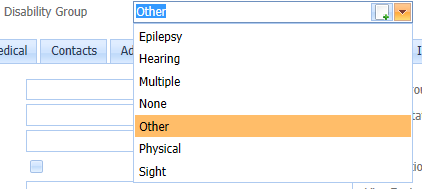
Religion
The user selects the Religion by Left Clicking on the Drop Down List Box (
Example :
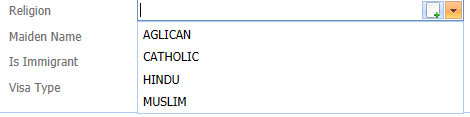
Select the applicable Religion by Left Clicking on it in the list. Should the user want to enter a new Religion it is done by Left Clicking on the Add Button (
|
Ethnic Group
The Ethnic Group is a Required field (
The user selects the Ethnic Group by Left Clicking on the Drop Down List Box (
Example :

Select the applicable Ethnic Group by Left Clicking on it in the list. Should the user want to enter a new Ethnic Group it is done by Left Clicking on the Add Button (
|
Marital Status
The user selects the Marital Status by Left Clicking on the Drop Down List Box (
Example :

Select the applicable Marital Status by Left Clicking on it in the list. Should the user want to enter a new Marital Status it is done by Left Clicking on the Add Button (
|