Menu
Index

How to SMS Balances to Customers

How to SMS Balances to Customers
 
 
1

Start Date

1. Start Date
 
Select the required Starting Date Value of which the SMS Balance Sheet is to start from. This Field is required.
2

Grade

2. Grade
 
Filter the SMS Balance Sheet by Grade by selecting the corresponding Grade Value.
3

Business Unit

3. Business Unit
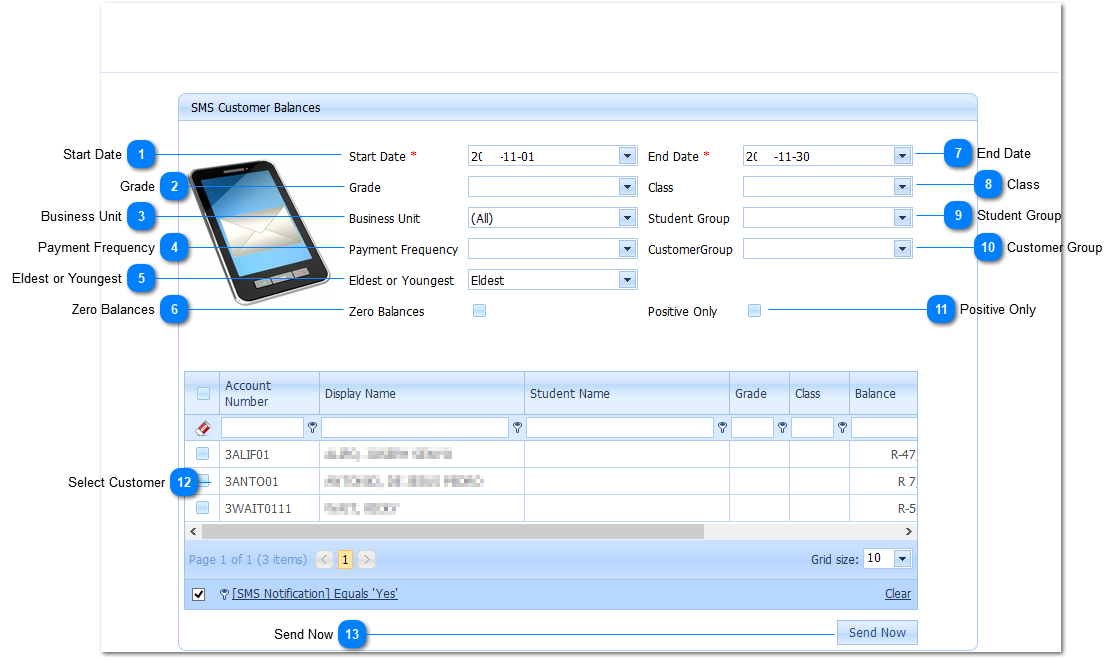
Select the according Business Unit or remain unchanged to select ALL Business Units. Selected Business units (Default ALL) will be filtered on the Balance Sheet.
4

Payment Frequency

4. Payment Frequency
 
Select the according Payment Frequency Value to adjust the filtering properties of the Balance Sheet to be provided.
5

Eldest or Youngest

5. Eldest or Youngest
 
Select the according Eldest or Youngest Value to adjust the filtering properties of the Balance Sheet to be provided.
6

Zero Balances

6. Zero Balances
 
Activate the Check Box to include or exclude Zero Balance Statement SMS's.
7

End Date

7. End Date
 
Select the required End Date Value of which the SMS Balance Sheet is to end at. This Field is required.
8

Class

8. Class
 
Filter the SMS Balance Sheet by Class by selecting the corresponding Class Value.
9

Student Group

9. Student Group
 
Filter the SMS Balance Sheet by Student Group by selecting the corresponding Group Value.
10

Customer Group

10. Customer Group
 
Filter the SMS Balance Sheet by Customer Group by selecting the corresponding Group Value.
11

Positive Only

11. Positive Only
 
Activate the Check Box to include or exclude Positive Balance Statement SMS's.
12

Select Customer

12. Select Customer
Use this checkbox control to select either all Customers (by Left-Clicking the icon on the General Toolbar) or individual records by Left-Clicking the icon next to desired rows.
13

Send Now

13. Send Now
 
By Left-Clicking on this Button the Selection will be processed and Statements will be sent to the selected Customers via SMS. Charges do apply.
Made with help of Dr.Explain