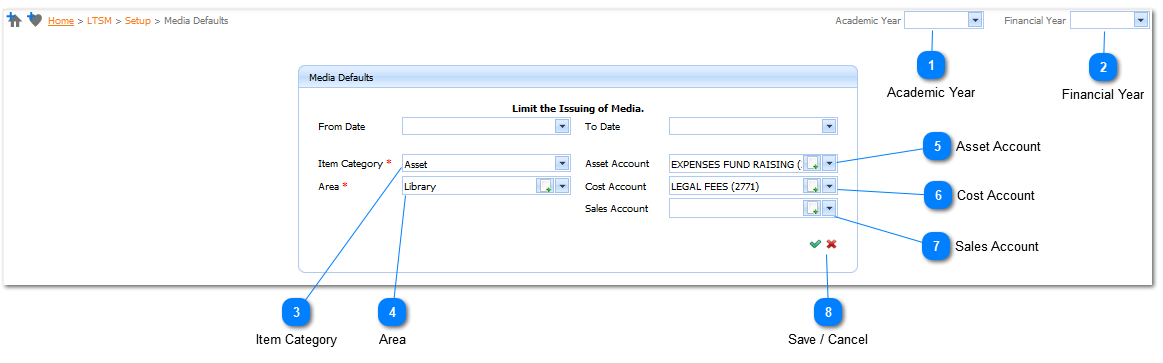
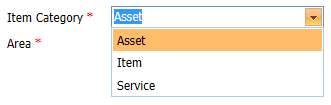
The Item Category is a Required field (). The user selects the Item Category, by Left Clicking on the Drop Down List Box (). When this is done a list of available Item Categories, will be displayed. There are Three predefined Categories (i) Asset (ii) Item and (iii) Service. Select the applicable Categoryby Left Clicking on it in the list.
Should the user not enter a Category and attempts to Save () the information the system will give an indication () that this is compulsory information.
The Area isa Required field (). The user selects the Area by Left Clicking on the Drop Down List Box (). When this is done a list of available Areas (Refer to [Refer to Accounting Module - Accounting / Items / Area ]) will be displayed. Should the user not Select anAreaand attempts to Save () the information the system will give an indication () that this is compulsory information.
Select the applicable Area by Left Clicking on it in the list. Should the user want to enter a New Area it is done by Left Clicking on the AddButton (). When this is done the Add AreaPage will be displayed (Refer to Accounting Module - Accounting / Items / Area).
Note:The Account details that are selected will be used to allocate newly added Media Items to
the Specified Account.
The user selects the Asset Account by Left Clicking on the Drop Down List Box (). When this is done a list of available Asset Accounts (Refer to [Refer to Accounting Module - Accounting / Accounts / Accounts ]) will be displayed. Select the applicable Asset Accountby Left Clicking on it in the list. Should the user want to enter a New Asset Accountit is done by Left Clicking on the AddButton (). When this is done the Add AccountPage will be displayed (Refer to Accounting Module - Accounting / Accounts / Accounts).
Note:The Account details that are selected will be used to allocate newly added Media Items to
the Specified Account.
The user selects the Cost Account by Left Clicking on the Drop Down List Box (). When this is done a list of available Cost Accounts (Refer to [Refer to Accounting Module - Accounting / Accounts / Accounts ]) will be displayed. Select the applicable Cost Accountby Left Clicking on it in the list. Should the user want to enter a New Cost Accountit is done by Left Clicking on the AddButton (). When this is done the Add AccountPage will be displayed (Refer to Accounting Module - Accounting / Accounts / Accounts).
Note:The Account details that are selected will be used to allocate newly added Media Items to
the Specified Account.
The user selects the Sales Account by Left Clicking on the Drop Down List Box (). When this is done a list of available Sales Accounts (Refer to [Refer to Accounting Module - Accounting / Accounts / Accounts ]) will be displayed. Select the applicable Sales Accountby Left Clicking on it in the list. Should the user want to enter a New Sales Accountit is done by Left Clicking on the AddButton (). When this is done the Add AccountPage will be displayed (Refer to Accounting Module - Accounting / Accounts / Accounts).
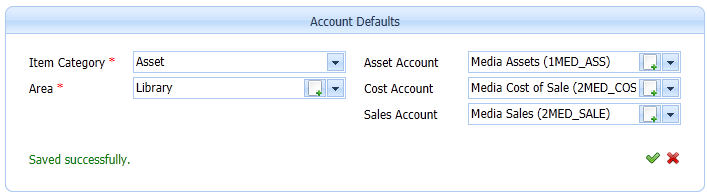
When all information has been entered the Library Account Defaults are saved by Left Clicking on the Save Button (). The system will give an indication that the Account Information has been SavedSuccessfully.
Should the user want to Cancel the Add Action, Left Click on the Cancel Button ().