Select the relevant Learners in the grid by Left-Clicking on this CheckBox Control Icon.
Once a Learner has been Selected, and all relevant information above has been Selected. The Process Button (see Bullet 9) may be Left-Clicked to Process the Request.
The CheckBox Control Icon will visually change from (Unselected) to (Selected) indicating the Learner has been Selected for Processing of the Request.
By Left-Clicking the CheckBox Control Icon in the General Toolbar (See Bullet 8), all Learners will be Selected with respect to the current Filtering Parameters.
Caution is to be considered using the "Select All" CheckBox Control Icon on the General Toolbar as this will Select all Learners with respect to the current Filtering Parameters, NOT the Learners visible on the current Grid View thusly selecting these Learners for the Process Request.
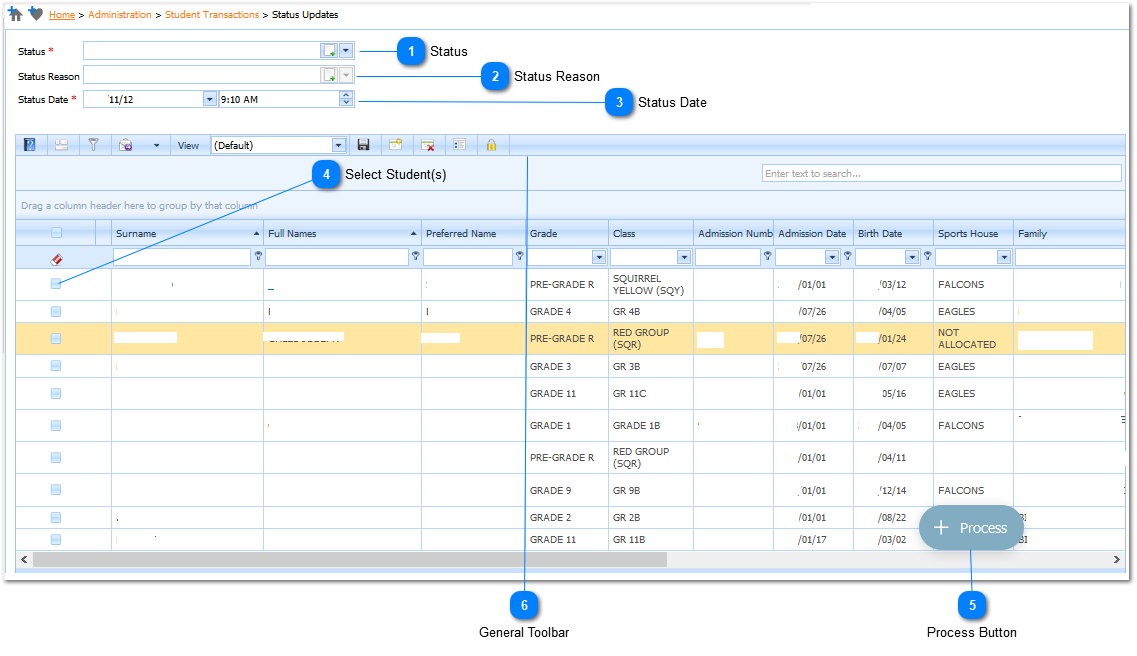
Left-Clicking on the Process Button will apply the above parameters (Bullets 1-3) to the Selected Learners (Bullet 4) with respect to the options Selected.