When deciding on an account number for a creditor (vendor), it has been Edupac's legacy rule of thumb to create the number as follows:
1. Creditor's accounts start with 4.
2. Next four characters are the first 4 letters of the vendor's surname / company name.
3. Last two characters are 01, 02 etc.
4. Example: The second vendor that is created with the company name Edupac will get Account number 3EDUP02.
Note:
The naming convention in the tip above is only a guideline. The format of an account number is a free format and may be any combination of characters.
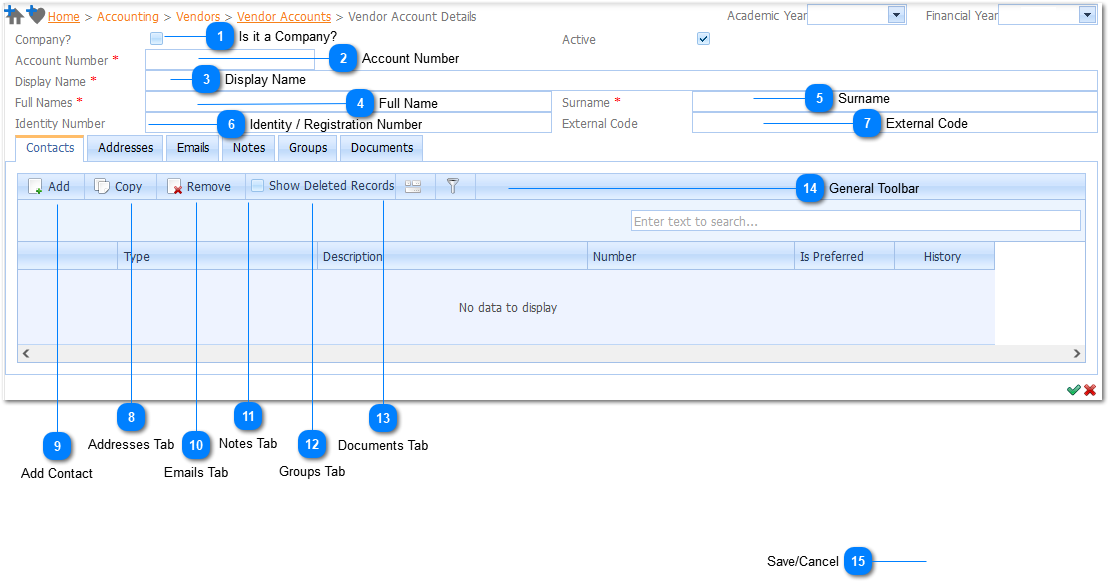
The Codeis a Required field ().The user is required to Enter a Code for the corresponding new Customer Account Detail. Should the user not Enter a Code and attempt to Save () the information the system will give an indication () that this is compulsory information.
Enter the name of the Vendor as you want it to be displayed on the Vendor list i.e. Edupac. Use the Trading Name of the Vendor as a rule of thumb.
The Display Nameis a Required field ().The user is required to Enter a Display Name for the corresponding new Account. Should the user not Enter a Display Name and attempt to Save () the information the system will give an indication () that this is compulsory information.
Enter the full name (Registered Name) of the Vendor i.e. Edupac Software Support Services (Pty) Ltd. or in the case of a person the person's full name.
The Full Nameis a Required field ().The user is required to Enter a Full Name for the corresponding new Account. Should the user not Enter a Full Name and attempt to Save () the information the system will give an indication () that this is compulsory information.
Enter the Surname of the person. In the case of a Company, enter the surname of a contact person in the company, or enter the trading name again.
The Surnameis a Required field ().The user is required to Enter a Surname for the corresponding new Account. Should the user not Enter a Surname and attempt to Save () the information the system will give an indication () that this is compulsory information.
The user can enter the Identity Number of the Vendor. Should the Vendor be a Company the Identity Number will be Replaced with the Registration Number of the Company.
When all information has been entered the Account is saved by Left Clicking on the Save Button (). Should the user want to Cancel the Add Action, Left Click on the Cancel Button ().