Menu
Index

Add Employee General
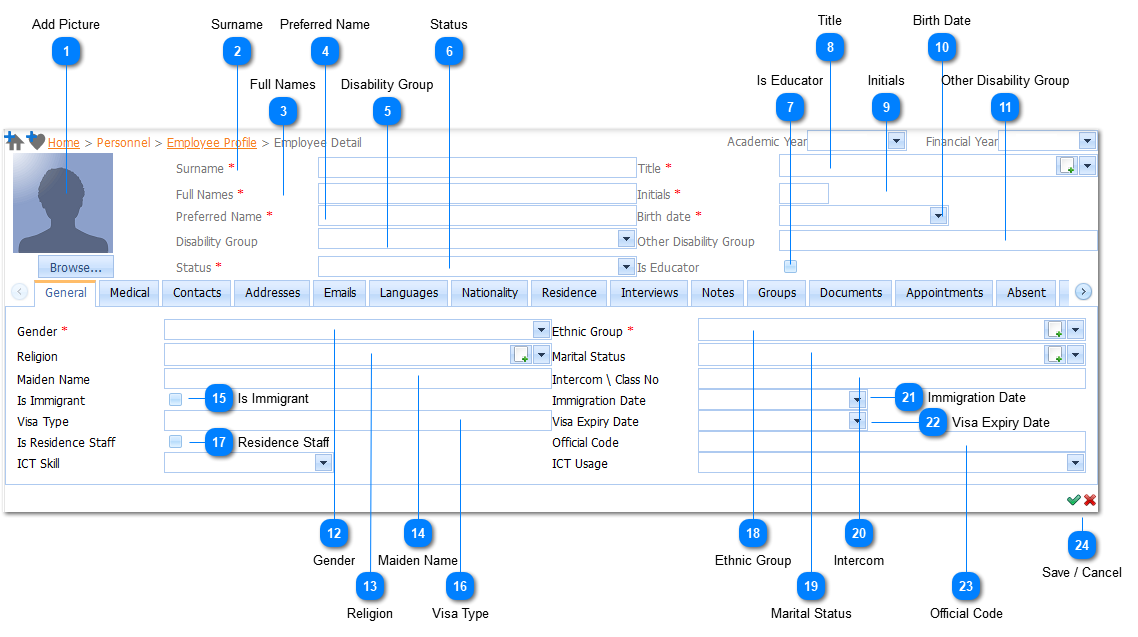
Add Employee General
1

Add Picture

1. Add Picture
 
The user can upload a picture of the Employee. Upload the Employee Image by Left Clicking  on the Browse button (Refer to Student Profile Upload Student Image).
 
Note:  (a)   The following file types are supported
 
(i)      *.JPEG
(ii)      *.PNG
(iii)     *.GIF
 
(b)     The Image file size is limited to a maximum of 1 Mb.
2

Surname

2. Surname
The Surname is a Required field ().  The user needs to enter a Surname. Should the user not enter a Surname and attempts to Save () the information the system will give an indication  () that this is compulsory information.
 
3

Full Names

3. Full Names
The Full Name is a Required field ().  The user needs to enter a Full Name. Should the user not enter a Full Name  and attempts to Save () the information the system will give an indication  () that this is compulsory information.
 
4

Preferred Name

4. Preferred Name
The Preferred Name is a Required field ().  The user needs to enter a Preferred Name. Should the user not enter a Preferred Name  and attempts to Save () the information the system will give an indication  () that this is compulsory information.
 
5

Disability Group

5. Disability Group
 
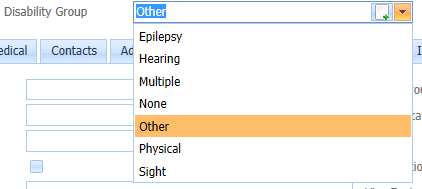
The user selects the Disability Group by Left Clicking on the Drop Down List Box (). When this is done a list of available Disability Groups will be displayed.
 
Example : 
 
Select the applicable Disability Group by Left Clicking on it in the list.
 
Note:
Should the user select the Disability Group to be Other, the Other Disability Group field (9) needs to be populated.
 
6

Status

6. Status
 
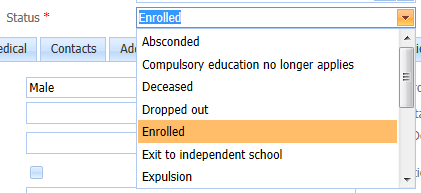
The Employee Status is a Required field ().  The user selects the Employee Status by Left Clicking on the Drop Down List Box . When this is done a list of available Employee Statuses will be displayed.
 
Example :
 
To Add/Change Employee Status records - Refer to Person Status. Select the applicable Employee Status by Left Clicking on it in the list. The user can type in the a part of the Employee Status. With each letter that is typed in the system will filter the Employee Statuses in the list. Should the user not enter an Employee Status and attempts to Save () the information the system will give an indication () that this is compulsory information.
 
7

Is Educator

7. Is Educator
 
An Employee can be both an Educator and a Employee. Should the employee be an Educator this Check Box needs to be checked.
8

Title

8. Title
The user selects the Title by Left Clicking on the Drop Down List Box (). When this is done a list of available Title's will be displayed.
 
Example : 
 
Select the applicable Title by Left Clicking on it in the list. Should the user want to enter a new  Title it is done by Left Clicking on the Add Button (). When this is done the Add Title Page will be displayed (Refer to Add Title).
9

Initials

9. Initials
The Initials is a Required field ().  The user needs to enter Initials. Should the user not enter Initials and attempts to Save () the information the system will give an indication  () that this is compulsory information.
 
10

Birth Date

10. Birth Date
The Birth Date is a Required field ().  The user needs to enter a Birth Date. Should the user not a enter Birth Date and attempts to Save () the information the system will give an indication  () that this is compulsory information.
 
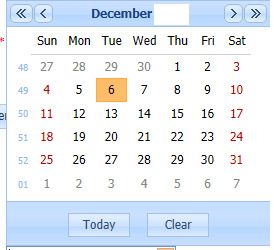
Make use of the Date Picker to enter the Birth Date. The Date Picker is displayed by Left Clicking on the Drop Down Button (). When this is done the Date Picker will be displayed. Select the applicable date by Left Clicking on the date in the Calendar.
 
11

Other Disability Group

11. Other Disability Group
Note:
Should the user select the Disability Group to be Other, the Other Disability Group field (9) needs to be populated.
12

Gender

12. Gender
The Gender is a Required field ().  The user needs to enter a Gender. Should the user not enter a Gender and attempts to Save () the information the system will give an indication  () that this is compulsory information.
 
 
The Gender is a Required field ().  The user selects the Gender by Left Clicking on the Drop Down List Box . When this is done a list of available Genders will be displayed.
 
Example :
 
Select the applicable Gender by Left Clicking on it in the list.
13

Religion

13. Religion
The user selects the Religion by Left Clicking on the Drop Down List Box (). When this is done a list of available Religions will be displayed.
 
Example : 
 
Select the applicable Religion by Left Clicking on it in the list. Should the user want to enter a new Religion it is done by Left Clicking on the Add Button (). When this is done the Add Religion Page will be displayed (Refer to Add Religion).
14

Maiden Name

14. Maiden Name
 
Should this be applicable the user can enter a Maiden Name.
15

Is Immigrant

15. Is Immigrant
 
Should the Employee be an Immigrant, Left Click the Check Box. When this is done a Check mark () will be displayed. The Check box can be unchecked by Left Clicking on the Check Box for a second time.
16

Visa Type

16. Visa Type
Should this be applicable the user can enter a Visa Type.
17

Residence Staff

17. Residence Staff
 
Should the Employee be a Residence Employee, Left Click the Check Box. When this is done a Check mark () will be displayed. The Check box can be unchecked by Left Clicking on the Check Box for a second time.
18

Ethnic Group

18. Ethnic Group
The Ethnic Group is a Required field ().  The user needs to enter an Ethnic Group. Should the user not enter an Ethnic Group and attempts to Save () the information the system will give an indication  () that this is compulsory information.
The user selects the Ethnic Group by Left Clicking on the Drop Down List Box (). When this is done a list of available Ethnic Groups will be displayed.
 
Example : 
 
Select the applicable Ethnic Group by Left Clicking on it in the list. Should the user want to enter a new Ethnic Group it is done by Left Clicking on the Add Button (). When this is done the Add Ethnic Group Page will be displayed (Refer to Add Ethnic Group).
19

Marital Status

19. Marital Status
The user selects the Marital Status by Left Clicking on the Drop Down List Box (). When this is done a list of available Marital Statuses will be displayed.
 
Example : 
 
Select the applicable Marital Status by Left Clicking on it in the list. Should the user want to enter a new Marital Status it is done by Left Clicking on the Add Button (). When this is done the Add Marital Status Page will be displayed (Refer to Add Marital Status).
20

Intercom

20. Intercom
 
If applicable enter the Intercom number for the Employee.
21

Immigration Date

21. Immigration Date
 
Should this be applicable the user can enter an Immigration Date. Make use of the Date Picker to do this. The Date Picker is displayed by Left Clicking on the Drop Down Button (). When this is done the Date Picker will be displayed. Select the applicable date by Left Clicking on the date in the Calendar.
 
22

Visa Expiry Date

22. Visa Expiry Date
Should this be applicable the user can enter a Visa Expiry Date. Make use of the Date Picker to do this. The Date Picker is displayed by Left Clicking on the Drop Down Button (). When this is done the Date Picker will be displayed. Select the applicable date by Left Clicking on the date in the Calendar.
 
23

Official Code

23. Official Code
 
Enter the Official Code that was issued to the Employee by the Department of Education.
24

Save / Cancel

24. Save / Cancel
 
When all information has been entered the Employee is saved by Left Clicking on the Save Button (). Should the user want to Cancel the Add Action, Left Click on the Cancel Button ().
Made with help of Dr.Explain