Menu
Index

Add New Document

Add New Document
1

Type

1. Type
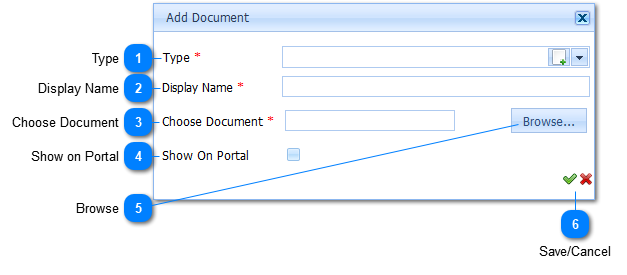
Select the according Document Type of the Document which is to be uploaded. If the availability of selection is undesired, add the appropriate Document Type by Left-Clicking on the Add New Button().
 
2

Display Name

2. Display Name
 
Enter the Document Display Name. This will be the Name of the Document that is to be uploaded once the Upload has been completed.
3

Choose Document

3. Choose Document
Choose Document may be performed by Left-Clicking on the Browse Button ().
Your Internet Browser will display a File-Selection and Upload dialogue. Browse to the document desired, select it and Left-Click the Dialogue's "Upload" button.
The selected document's Title will now appear in the Choose Document Field, indicating the document has been transferred from your Local Device to the Server.
Only once the Save Button in Bullet 6 has been Left-Clicked will the document be stored.
4

Show on Portal

4. Show on Portal
By Left-Clicking on the Check-Box Icon, the user may indicate whether the Document is to be visible or invisible on the Parent's Portal to the Customer Entity currently Registered as this Customer Profile
5

Browse

5. Browse
See Bullet 4
6

Save/Cancel

6. Save/Cancel
When all information has been entered the Document is saved by Left Clicking on the Save Button (). Should the user want to Cancel the Add Action, Left Click on the Cancel Button ().
Made with help of Dr.Explain