
Customer Account Details
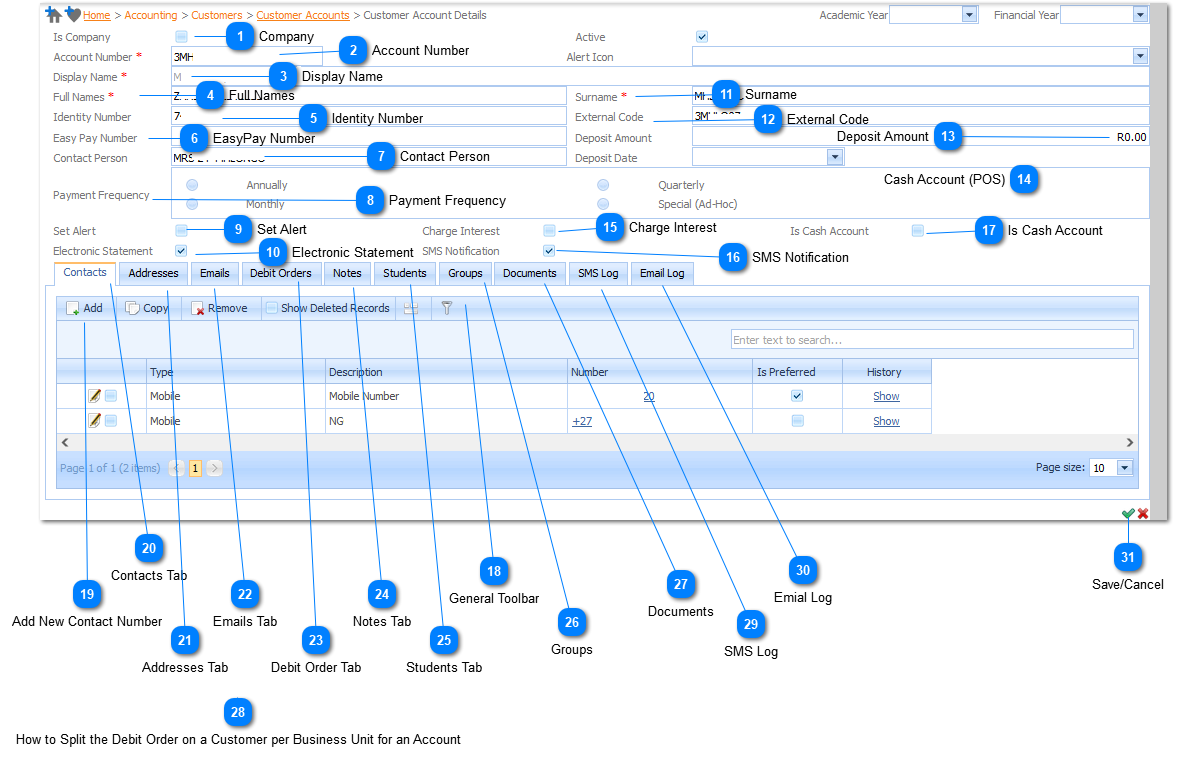

Add New Contact Number
Refer To Add Contact Number
|
Contacts Tab
A List of Contact details will be displayed under this tab.
Refer To Add Contact Number
|
Addresses Tab
Refer To Addresses Tab
|
Emails Tab
Refer To Emails Tab
|
Debit Order Tab
Refer To Debit Orders Tab
|
Students Tab
Refer To Students Tab
|