Menu
Index

How to Email Statements to Guardians/Customers

How to Email Statements to Guardians/Customers
Note:     The Default list of Customer names are filtered using the tick in the Customer's Profile.
 
If the Customer's name is not displayed, then the tick in his Profile is not ticked.


1

Start Date

1. Start Date
 
Select the Start Date of the Statement.
2

End Date

2. End Date
 
Select the End Date of the Statement.
3

Grade

3. Grade
 
Use the Grade Field to Filter a specific Learner(s) according to their Grade (if applicable).
4

Class

4. Class
 
Use the Class Field to Filter a specific Learner(s) according to their Class (if applicable).
5

Business Unit

5. Business Unit
Select a Business Unit (if applicable).
6

Student Group

6. Student Group
Use the Group Field to Filter a specific Learner(s) according to their Variable Groups (if applicable).
7

Payment Frequency

7. Payment Frequency
 
Use the Payment Frequency Field to Filter a specific Learner(s) according to their Payment Frequency (if applicable).
8

Customer Group

8. Customer Group
Use the Group Field to Filter a specific Entity(ies) according to their Variable Groups (if applicable).
9

Eldest or Youngest

9. Eldest or Youngest
Select either value to further filter such that only the Eldest or Youngest Learner per Account Holder will be selected for the Statement.
10

Show Zero Balances

10. Show Zero Balances
 
If ticked, then Customers with Zero Balances will be added to the list.
11

Show Positive Only

11. Show Positive Only
If ticked, then only Customers with debit balances will be shown on the list.
12

Message

12. Message
 
Enter a Message that will form part of the e-mail body.
13

Template

13. Template
Select a mail Template from the drop down list.
 
Templates are set up in Services>Message Templates.
14

Select All

14. Select All
 
Use the Select All tick box to Select/Deselect ALL Customers listed as recipients of the statement via e-mail.
15

Select Individual

15. Select Individual
 
Use the Select Individual tick box to Select/Deselect Indivual Customers listed as recipients of the statement via e-mail.
16

Filtered by

16. Filtered by
 
Note:     The Default list of Customer names are filtered using the tick in the Customer's Profile.
 
If the Customer's name is not displayed, then the tick in his Profile is not ticked.
 
 
17

Clear Filter

17. Clear Filter
 
Click on the Clear Filter Button to remove the filter as described in Point 14 above.
18

Send Now

18. Send Now
 
Send the Statement(s) via e-mail to the selected Customers by clicking on the Send Now Button.
19

Encrypt Email Statements with Password

19. Encrypt Email Statements with Password
Guardian and Customer Email Statements can now be encrypted with a password before sending the statement emails.
 
a)     Password used will be in the following order:
 
·     Identity Number (ID Number)
·     Passport Number (If no ID Number)
·     School EMIS Number (If none of the above is captured)
 
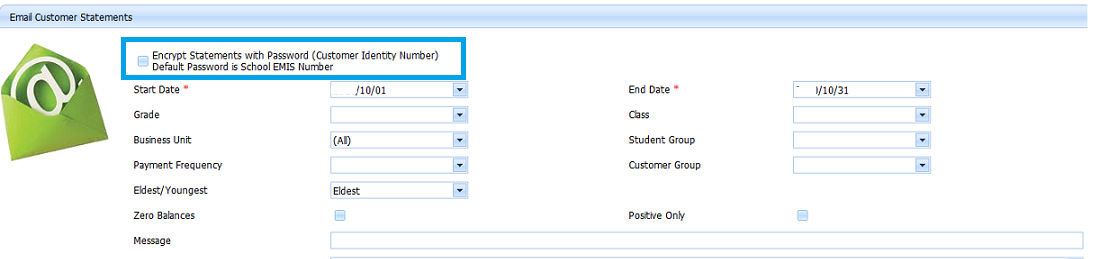
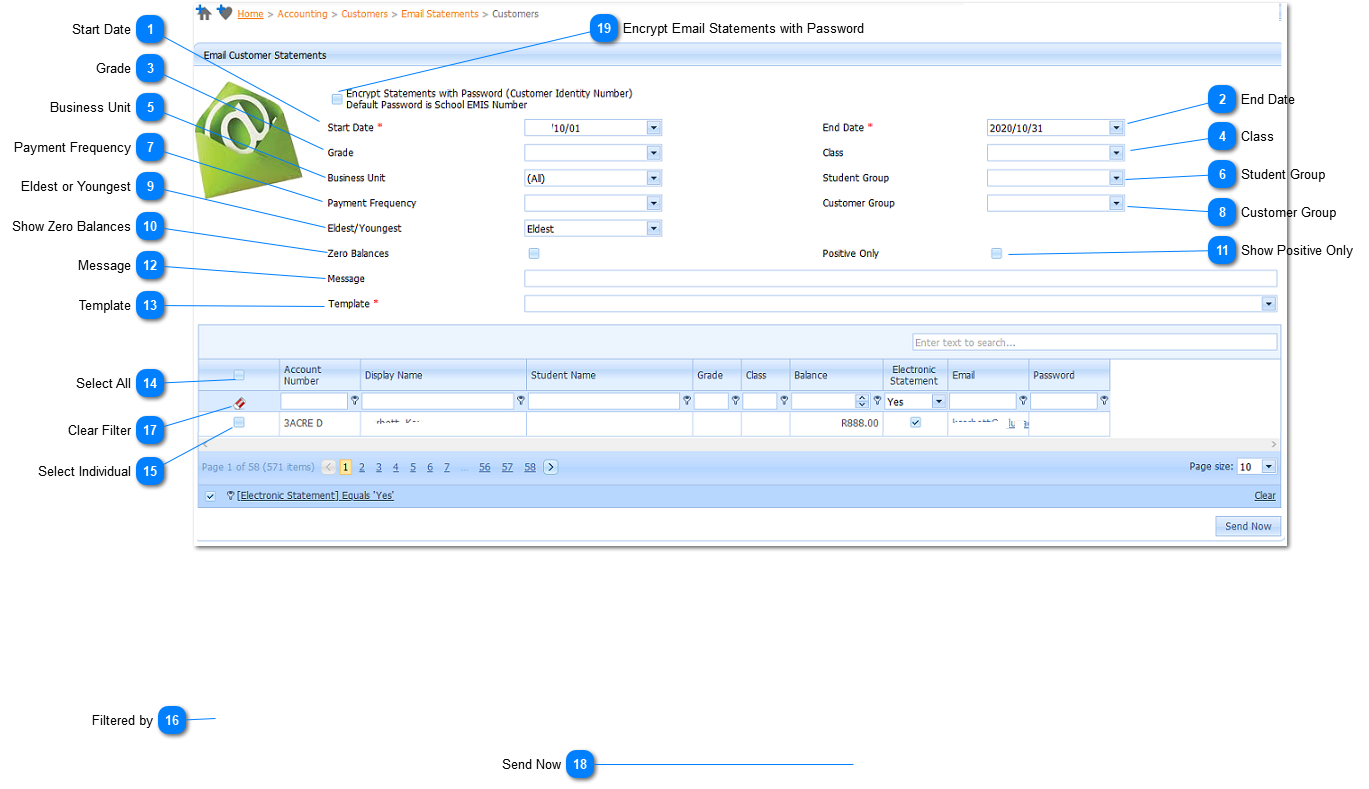
b)     Navigate to Guardian Email Statement
 
Home > Accounting > Customers > Email Statements > Guardians
 
     Steps:
 
·     Check the Encrypt Statement Checkbox.
 
 
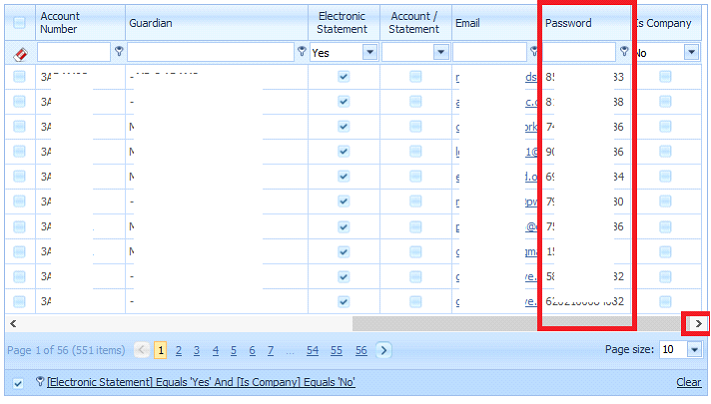
·     The user can view the password that was used for the encryption by viewing the Password in the Grid View (Scroll to the Right).
 
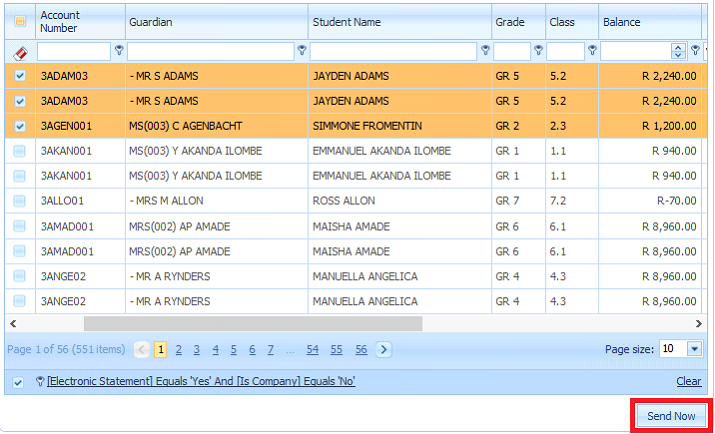
·     Select Guardian or Customer to send statements to.
 
·     Click the Send Now button. ()
 
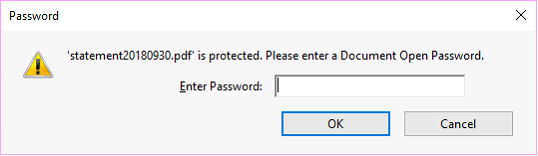
·     Customer or Guardians will receive the following message when trying to view statement.
 
 
Note the following:
 
·     Should the school implement the Password Encryption on the Customer / Guardian statements, it is the responsibility of the school to communicate the                                    above-mentioned process to the Customers / Guardians.
·     Should a Customer / Guardian not be able to open a statement the Customer / Guardian must contact the school to obtain the correct Password.
 
This is not an Edupac Helpdesk function.
 
Made with help of Dr.Explain