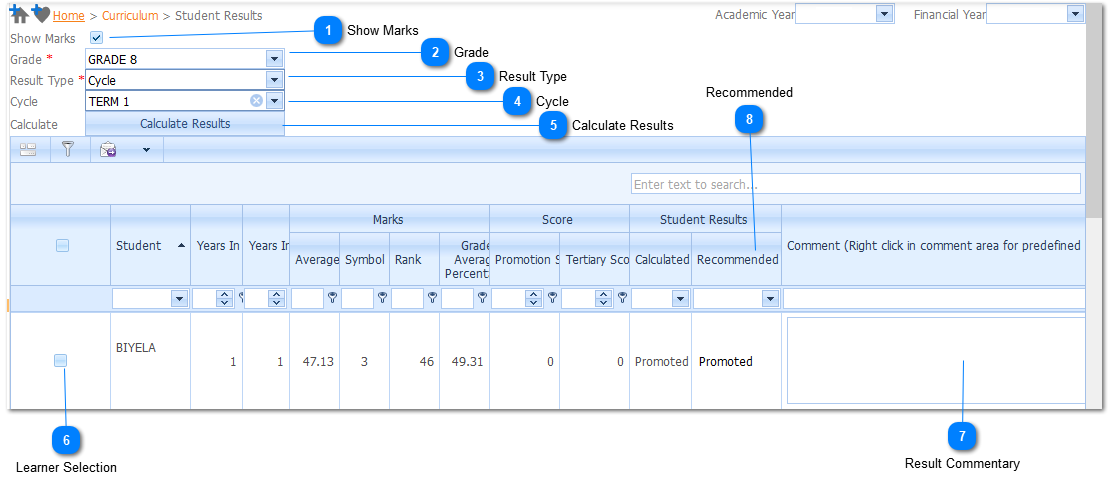
Menu
Index

Student Results

Student Results
 
1

Show Marks

1. Show Marks
When the Show Marks Check Box is Checked, all Marks Calculations are done
before the Page can be displayed.
The implication of this is that the display of the page is delayed because of
calculations that need to be completed.
Should the user Check the Show Marks Check Box, the marks calculation are
done. The page response time is thus much slower.
2

Grade

2. Grade
The Grade is  a Required field ().  Select the Student Grade for which the Results will be Calculated. The user selects the Grade by Left Clicking on the Drop Down List Box (). When this is done a list of available Grades will be displayed. Should the user not Select a Grade the Calculate Results Button () will not be Active. Select the applicable Student Grade by Left Clicking on it in the list.
3

Result Type

3. Result Type
The Result Type is  a Required field ().  Select the Result Type for which the Results will be Calculated. The user selects the Result Type by Left Clicking on the Drop Down List Box (). When this is done a list of available Grades will be displayed. Should the user not Select a Grade the Calculate Results Button () will not be Active. Select the applicable Result Type by Left Clicking on it in the list.
 
4

Cycle

4. Cycle
 
Should the Selected Result Type be Cycle, the user needs to select a Cycle. Select the Cycle for which the Results will be Calculated. The user selects the Cycle by Left Clicking on the Drop Down List Box (). When this is done a list of available Cycles will be displayed. Should the user not Select a Cycle the Calculate Button ()will not be Active. Select the applicable Cycle  by Left Clicking on it in the list.
 
Should the selected Result Type be Year or Promotion the Cycle Option will be In-Active - the user will not be able to select a Cycle.
5

Calculate Results

5. Calculate Results
When the above mentioned information have been entered, the Student Results is Calculated by Left Clicking on the Calculate Results Button ().
6

Learner Selection

6. Learner Selection
Select the relevant Learners in the grid by Left-Clicking on this CheckBox Control Icon.
Once a Learner has been Selected, and all relevant information above has been Selected. The Calculate Results Button may be Left-Clicked to Process the Request.
The CheckBox Control Icon will visually change from (Unselected) to (Selected) indicating the Learner has been Selected for Processing of the Request.
By Left-Clicking the CheckBox Control Icon in the General Toolbar , all Learners will be Selected with respect to the current Filtering Parameters.
Caution is to be considered using the "Select All" CheckBox Control Icon on the General Toolbar as this will Select all Learners with respect to the current Filtering Parameters, NOT the Learners visible on the current Grid View thusly selecting these Learners for the Process Request.
7

Result Commentary

7. Result Commentary
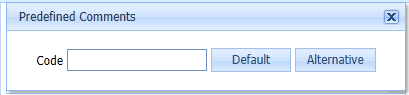
The user has the option to enter  comments on the Result. The user can Add Comments that were created by making use of the Comments Menu Option (Refer to - Comments ) by Right Clicking on the Comments Cell. The Add Comments screen below will be displayed. The user enters the Code for the Predefined Comment. Select the Default or Alternative option by Left Clicking on it. When this is done the Add Predefined Comment screen will be Closed and the Comment will be displayed.
 
8

Recommended

8. Recommended
The user can over-ride the Calculated Result by making use of the Recommended Option. The user selects the Recommended Result by Left Clicking on the Drop Down List Box () to the Right of the Recommended Result. When this is done a list of available Results will be displayed.
 
 
Select the applicable Recommended Result by Left Clicking on it in the list.
Note:  The Recommended Result will be Returned to the original Result Value when the user repeats
a Calculate Result (also known as a Re-Calc).
Made with help of Dr.Explain