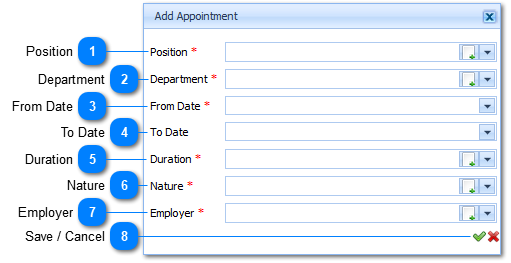
Menu
Index

Add Appointment

Add Appointment
1

Position

1. Position
The Position is a Required field ().  The user selects the Position by Left Clicking on the Drop Down List Box (). When this is done a list of available Positions will be displayed.
 
Example : 
 
Select the applicable Position by Left Clicking on it in the list. Should the user want to enter a New Position it is done by Left Clicking on the Add  Button (). When this is done the Add Position Page will be displayed (Refer to Position ). Should the user not enter a Position and attempts to Save () the information the system will give an indication () that this compulsory information.
 
2

Department

2. Department
 
The Department is a Required field ().  The user selects the Department by Left Clicking on the Drop Down List Box (). When this is done a list of available Departments will be displayed.
 
Example : 
 
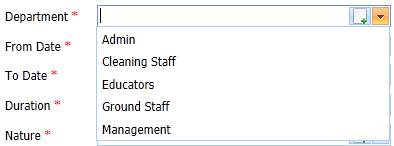
Select the applicable Department by Left Clicking on it in the list. Should the user want to enter a New Department it is done by Left Clicking on the Add  Button (). When this is done the Add Department Page will be displayed (Refer to Add Department ). Should the user not enter a Department and attempts to Save () the information the system will give an indication () that this compulsory information.
 
3

From Date

3. From Date
The From Date is a Required field ().  The user needs to enter a From Date. Should the user not enter a From Date and attempts to Save () the information the system will give an indication  () that this is compulsory information.
 
Make use of the Date Picker to enter the From Date. The Date Picker is displayed by Left Clicking on the Drop Down Button (). When this is done the Date Picker will be displayed. Select the applicable date by Left Clicking on the date in the Calendar.
 
4

To Date

4. To Date
 
The To Date is a Required field ().  The user needs to enter a To Date. Should the user not enter a To Date and attempts to Save () the information the system will give an indication  () that this is compulsory information.
 
Make use of the Date Picker to enter the To Date. The Date Picker is displayed by Left Clicking on the Drop Down Button (). When this is done the Date Picker will be displayed. Select the applicable date by Left Clicking on the date in the Calendar.
 
5

Duration

5. Duration
 
The Duration is a Required field ().  The user selects the Duration by Left Clicking on the Drop Down List Box (). When this is done a list of available Durations will be displayed.
 
Example : 
 
Select the applicable Duration by Left Clicking on it in the list. Should the user want to enter a New Duration it is done by Left Clicking on the Add  Button (). When this is done the Add Duration Page will be displayed (Refer to Add Duration). Should the user not enter a Duration and attempts to Save () the information the system will give an indication () that this compulsory information.
 
6

Nature

6. Nature
 
The Nature is a Required field ().  The user selects the Nature by Left Clicking on the Drop Down List Box (). When this is done a list of available Natures will be displayed.
 
Example : 
 
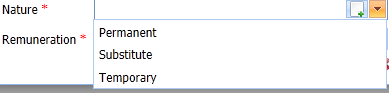
Select the applicable Nature by Left Clicking on it in the list. Should the user want to enter a New Nature it is done by Left Clicking on the Add  Button (). When this is done the Add Nature Page will be displayed (Refer to Add Nature). Should the user not enter a Nature and attempts to Save () the information the system will give an indication () that this compulsory information.
 
7

Employer

7. Employer
The Employer Type is a Required field ().  The user selects the Employer by Left Clicking on the Drop Down List Box (). When this is done a list of available Employers will be displayed.
 
Example : 
 
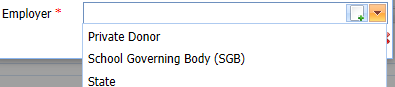
Select the applicable Employer by Left Clicking on it in the list. Should the user want to enter a New Employer it is done by Left Clicking on the Add  Button (). When this is done the Add Employer Page will be displayed (Refer to Add Employer). Should the user not enter an Employer and attempts to Save () the information the system will give an indication () that this compulsory information.
 
8

Save / Cancel

8. Save / Cancel
When all information has been entered the Appointment is saved by Left Clicking on the Save Button (). Should the user want to Cancel the Add Action, Left Click on the Cancel Button ().
Made with help of Dr.Explain