Menu
Index

Export Data from Edupac EnterPrise Edition

Export Data from Edupac EnterPrise Edition
 
 
1

Export Data File Selection

1. Export Data File Selection
 
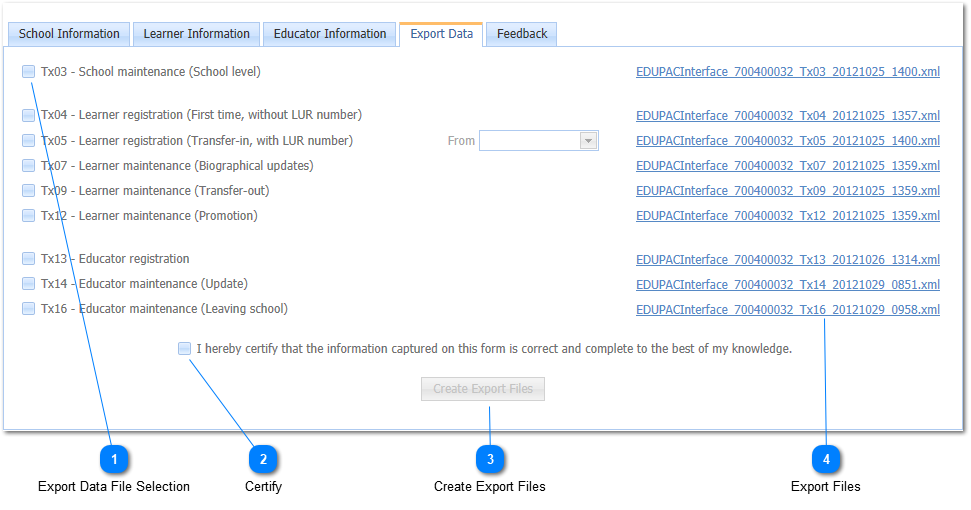
The user needs to select the Lurits Information that needs to be Uploaded. This is done by Left Clicking on the Selection Box to the Left of each of the files (). The Files can be submitted One at a time or Multiple Files can be selected. When a File is selected for Export, a Check Mark will be Displayed ().
 
2

Certify

2. Certify
Once the Export Files have been Selected, the user needs to Certify that all information is correct before the Export Files can be Created.
 
The Information is Certified by Left Clicking on the Selection Box to the Left of the Certification Statement ().
3

Create Export Files

3. Create Export Files
 
The Create Export Files Button will not be Active until the User Certifies the Information.
 
When the user has Certified the Information, the Create Export Files Button will be Active.
 
Select the the Create Export Files Button to Create the Export Files.
4

Export Files

4. Export Files
 
 
Made with help of Dr.Explain