
Management
(Books, DVD's etc.).
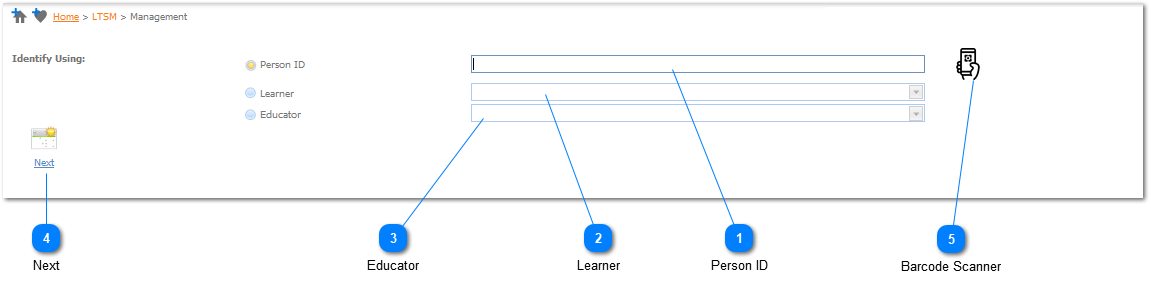
Person ID
The Person ID is created when the user prints Student / Educator ID Cards making use of the Reports Option in the Administration Module - (Refer to Administration Module - Administration / Reports / ID Card / Student ID Cards or Educator ID Cards). The user can initiate one of the 3 mentioned transactions (Issuing, Returning and Reserving) by either (i) manually entering the Person ID for the Student / Educator or (ii) Scanning the Person ID Barcode from the Student / Educator ID Card that was printed.
As soon as a Person ID has been keyed in Manually or has been Scanned in, the Issuing, Returning and Reserving page will be Displayed - Refer to Issue / Return / Reserve - Media.
|
Learner
Should the user not have a Learner ID available when wanting to (i) Issue, (ii) Return or Reserve a Media Item the user can select the Learner from the list of available Learners that have been registered on the system. Left Click on the Learner Selection Button. When this is done the Learner Drop Down List Box will be active (
|
Educator
Should the user not have a Educator ID available when wanting to (i) Issue, (ii) Return or Reserve a Media Item the user can select the Educator from the list of available Educator that have been registered on the system. Left Click on the Educator Selection Button. When this is done the Educator Drop Down List Box will be active (
|

Barcode Scanner
Refer to Enterprise Edition Barcode Scanner.
|