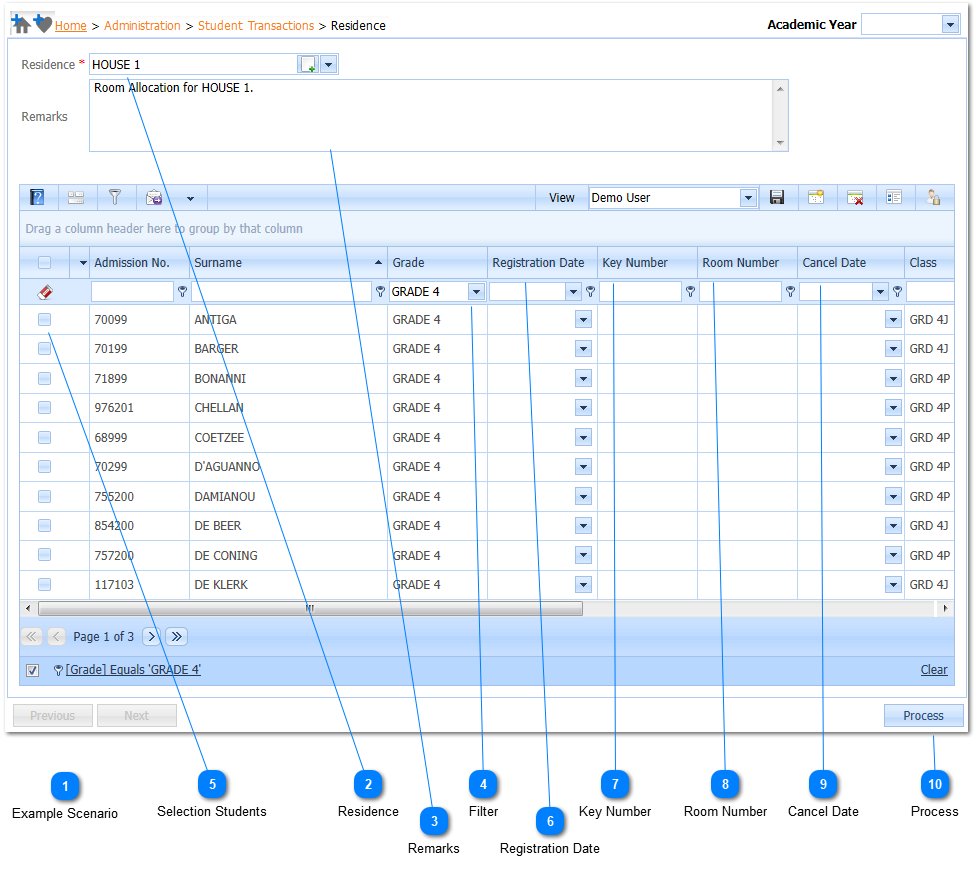
The user selects the Residence to which the students will be allocated to, by Left Clicking on the Drop Down List Box (). When this is done a list of available Residences will be displayed.
Example :
Select the HOUSE 1 by Left Clicking on it in the list.
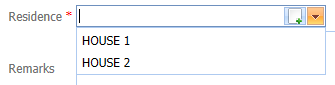
Select the students by Left Clicking on the Check Box ()to the Left of the Admission number. When this is done a Check Mark will be displayed in the Check Box () indicating that the record has been selected.
Note:
Should the user enter a Registration Date, Room Number, Key Number etc. the Student Selection Check Box will automatically be Checked.
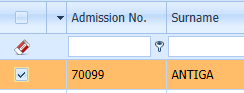
Select the Registration Date for the student. The Date Picker is displayed by Left Clicking on the Drop Down Button (). When this is done the Date Picker will be displayed. Select the applicable date by Left Clicking on the date in the Calendar.
Note:
Should the user not select a Date the Registration Date will be populated with Current Date (Today's Date) when the page is Saved.
As soon as the user enters a Cancel Date and the Page is refreshed the record will be removed from the list. Should the user have made a mistake the Cancel Date can be removed by Editing the Residence record on the Student Profile.
Select the Cancel Date for the student. The Date Picker is displayed by Left Clicking on the Drop Down Button (). When this is done the Date Picker will be displayed. Select the applicable date by Left Clicking on the date in the Calendar.
Once the students records have been selected, the allocation is done by Left Clicking on the Process Button. When the Processing is completed the Residence Page will be displayed.