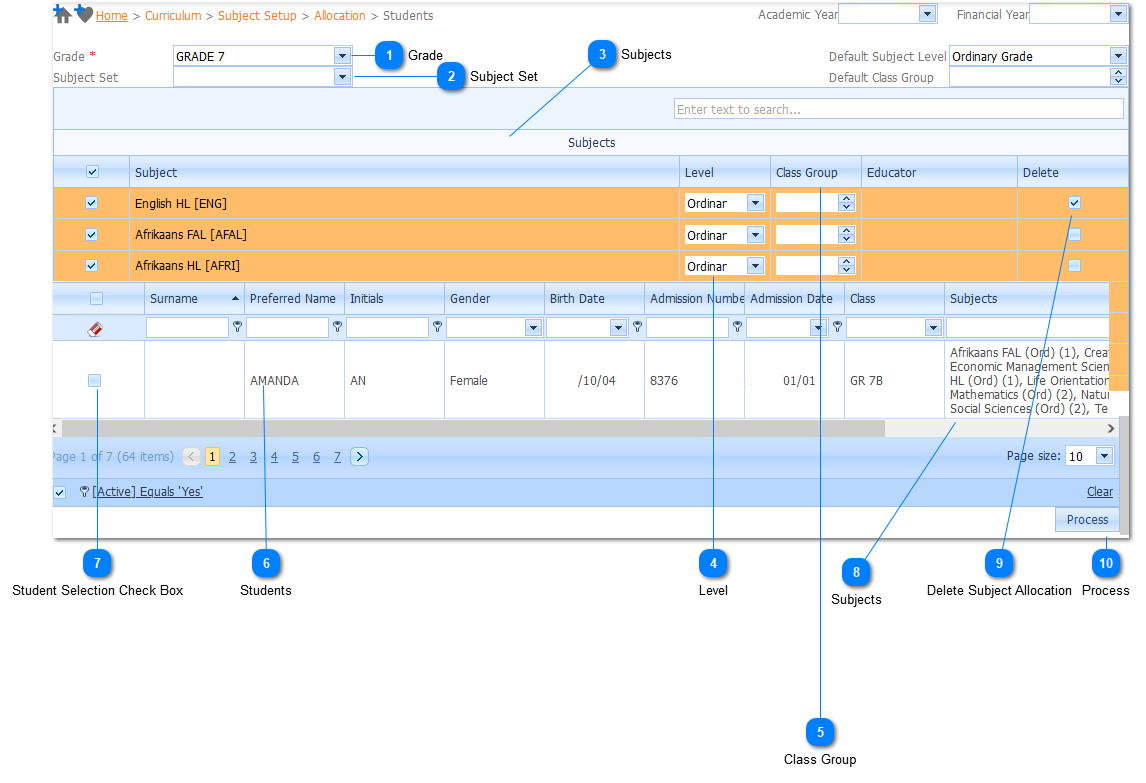
Menu
Index

Students

Students
 
1

Grade

1. Grade
 
The Grade is a Required field ().  Select the Student Grade for which the Subjects will be allocated. The user selects the Grade by Left Clicking on the Drop Down List Box (). When this is done a list of available Grades will be displayed. Should the user not Select a Grade and attempts to Save () the information the system will give an indication  () that this is compulsory information.
 
 
Select the applicable Student Grade by Left Clicking on it in the list. As soon as the Grade is selected all available Subjects that have been created for the specific grade is displayed. Should all subjects be allocated to the students in Grade 7 select all Subjects. The Subjects are selected by Left Clicking on the Subject Selection Boxes to the Left of the Subject.
 
2

Subject Set

2. Subject Set
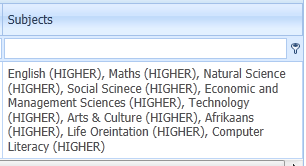
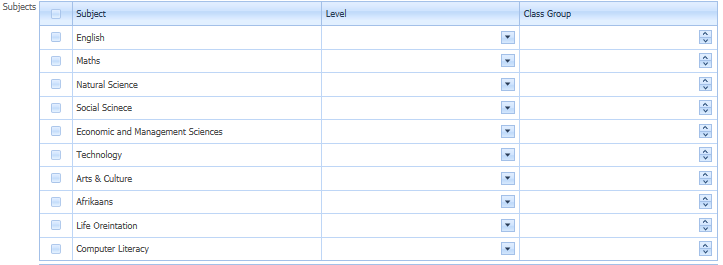
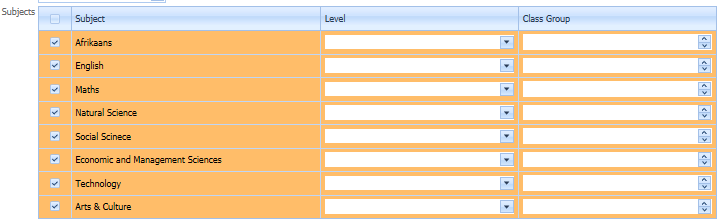
For this example all Subjects need to be allocated to students excluding, Life Orientation and Computer Literacy. A Grade 7 General Subject Set was Created (Refer to - Add Subject Set Example).
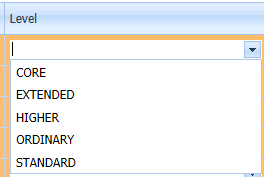
The user selects the Subject Set by Left Clicking on the Drop Down List Box (). When this is done a list of available Subject Sets will be displayed.
 
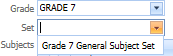
Select the applicable Subject Set by Left Clicking on it in the list. The Subject Set that was created will be displayed - as can be seen in this case Life Orientation and Computer Literacy are excluded from the list.
 
 
3

Subjects

3. Subjects
 
Should the user not have created a Subject Set, Subjects are manually selected from the Subject List by Left Clicking on the Subject Selection Check Box to the Left of the Subject. When this is done the a Check mark () will be displayed in the Check Box and the Subject will be Highlighted.
4

Level

4. Level
The user needs to Select a Level for each Subject. The user selects the Level by Left Clicking on the Drop Down List Box (). When this is done a list of available Levels will be displayed.
 
Select the applicable Subject Level by Left Clicking on it in the list. Should the user not select a Level and attempts to Process the allocation the system will give an indication that the Level is required.
 
5

Class Group

5. Class Group
 
Next a Class Group needs to be assigned to each Subject. The Class Group is a Numeric value. The user can enter the Class Group (numeric value) or make use of the Increase / Decrease  button () to enter a Value for the Class Group .  Should the user not enter a Class Group and attempts to Process the allocation the system will give an indication that a Class Group  is  is required.
 
6

Students

6. Students
 
As soon as the Grade is selected a List of Students that have been allocated to the selected Grade will be displayed.
 
7

Student Selection Check Box

7. Student Selection Check Box
The user needs to select the Students to whom the selected Subjects / Subject Set need to be allocated. The students are selected by Left Clicking on the Student Selection  Check  Box to the Left of the Student. When this is done the a Check mark () will be displayed in the Check Box. Should the user not select Student(s)  and attempts to Process the allocation the system will give an indication that a Class Group  is  is required.
 
8

Subjects

 
When the Subjects Allocation have been processed, the Subjects that have been allocated to a student are displayed. Should the user need to make changes to the allocations it is done on the Student profile Academic Tab.
 
Should the user open the Academic Tab on the Student Profile, the page below will be displayed. All Subjects that have been allocated to the student will be displayed in the Subject List.
 
Note:  Should the user have allocated  subjects to a student that should not have been allocated, the subjects
are removed on this tab by making use of the General Toolbar Remove Option.
 
9

Delete Subject Allocation

9. Delete Subject Allocation
If the CheckBox Control Icon has been selected for certain subject records, they will be "De-Allocated" (Deleted from the Student's Allocation Record) once the Process Button has been Left-Clicked.
In the event that a Subject has been selected for "Deletion" by the abovementioned method, a Pop-Up dialogue will appear once the Process Button has been Left-Clicked to confirm the action.
10

Process

10. Process
When all information has been entered, the Subject Allocations is done (saved) by Left Clicking on the Process Button.
 
Made with help of Dr.Explain