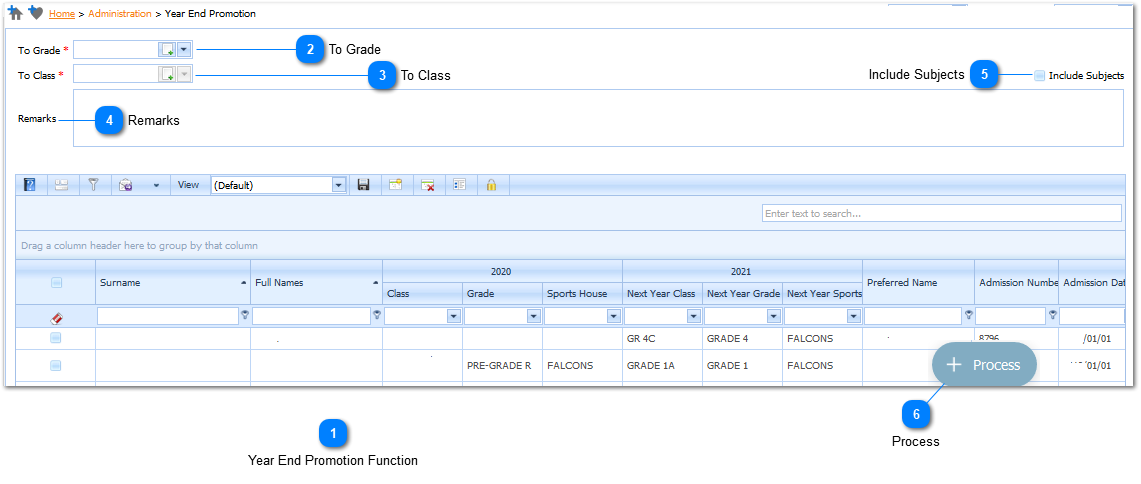
Menu
Index

Year End Promotion

Year End Promotion
1

Year End Promotion Function

1. Year End Promotion Function
Example: Example: Students currently in Grade 3J (2011) must be promoted to Grade 4Q (2012).
2

To Grade

2. To Grade
The Grade is a Required field ().  The user selects the TO  Grade (the Grade where the students will be promoted to) by Left Clicking on the Drop Down List Box (). When this is done a list of available Grades will be displayed.
 
Example : 
 
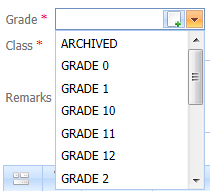
Select the applicable Grade by Left Clicking on it in the list. Should the user want to enter new a Grade it is done by Left Clicking on the Add Button (). When this is done the Add Grade Page will be displayed (Refer to Add Grades - Read Note Below). Should the user not enter a Grade and attempts to Process the information by Left Clicking on the Process Button () the system will give an indication () that this is compulsory information.
Note:
When the Add Grades Page is displayed only the required fields will be displayed and not all the fields that are displayed when using the Add Grades Page to Add a Grade.
3

To Class

3. To Class
The Class is a Required field ().  The user selects the TO  Class (the Class where the students will be promoted to) by Left Clicking on the Drop Down List Box (). When this is done a list of available Classes will be displayed.
 
Example : 
 
Select the applicable Class by Left Clicking on it in the list. Should the user want to enter new a Class it is done by Left Clicking on the Add Button (). When this is done the Add Class Page will be displayed (Refer to Add Classes - Read Note Below). Should the user not enter a Class and attempts to Process the information by Left Clicking on the Process Button ()the system will give an indication () that this is compulsory information.
Note:
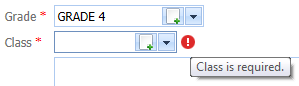
When the Add Classes Page is displayed only the required fields will be displayed and not all the fields that are displayed when using the Add Classes Page to Add a Class.
4

Remarks

4. Remarks
The user can Enter  Remarks for the Promotion.    
5

Include Subjects

5. Include Subjects
 
Should the subjects, that are currently allocated to the students (in the current Academic) be carried over to the next Academic Year, the user should Left Click the Include Subjects Check Box (). When this is done a Check Mark is displayed (). Should the user want to un-select the Include Subjects option, Left Click on the Include Subjects Check Box for a second time. The Check Mark will be removed.
6

Process

6. Process
Made with help of Dr.Explain