
Administration Panel
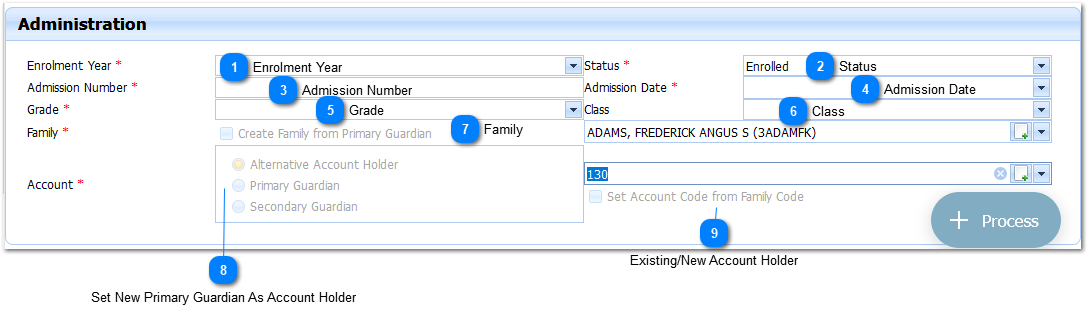
Enrolment Year
The Enrolment Year is a Required field (
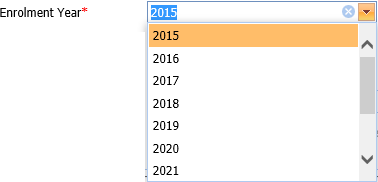
Select the applicable Enrolment Year by Left Clicking on it in the list. The user can type in the a part of the Academic Year. With each letter that is typed in the system will filter the Academic Years in the list.
Should the user not select a Academic Year and attempts to Process
Note: If a future Academic Year is not available in the list - it must be added manually first. Refer to Add Academic Year
|
Status
The Student Status is a Required field (
Example :
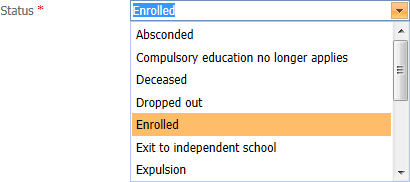
To Add/Change Student Status records - Refer to Person Status. Select the applicable Student Status by Left Clicking on it in the list. The user can type in the a part of the Student Status. With each letter that is typed in the system will filter the Student Statuses in the list.
Should the user not select a Status and attempts to Process
|

Family
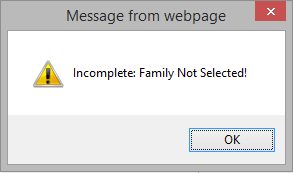
The Family is a Required field (
When this is done a list of available Families will be displayed.
Example :

Select the applicable Family by Left Clicking on it in the list. The user can type in the a part of the Family Display Name or Family Code. With each letter that is typed in the system will filter the surnames in the list. Should the user want to enter a New Family it is done by Left Clicking on the Add Button (
Should the user not select a Family and attempts to Process
|
